
Author: grdssiriwardhana

How to Survive and Thrive Across All Biomes in Children of Morta
1. Game Overview Children of Morta is an action-RPG with roguelite elements where you control the Bergson family, guardians of Mount Morta, against a spreading evil known as the Corruption. You unlock and play as multiple family members, each with distinct styles and skillsets, while exploring dungeons that are procedurally generated. Between runs, you return home, level up family members, unlock shared upgrades, and deepen characters’ stories. The game blends emotional storytelling about loss, hope, and sacrifice with tense combat, varied abilities, and artistic pixel art visuals. Quick Reminder: Don’t forget gems because they’re needed not only to open chests, but also to buy relics and Divine Graces from the in-dungeon merchant. 2. Core Systems Cheat Sheet Below is a streamlined reference table summarizing Children of Morta’s core systems. It outlines how your family’s growth, dungeon runs, upgrades, and narrative elements interlock, and how each system shapes what you do during and between runs. Use this snapshot to understand the mechanics at a glance before diving into detailed strategy. SystemWhat It DoesPlayer ImpactFamily Progression and HomesteadSpend gold and resources to unlock permanent upgrades, traits, and boostsPower buildup carries between runs, easing future runsRun Structure (Vaults and Dungeons)Procedurally generated rooms, events, mobs, and bossesRewards (XP, relics, runes) fuel your progression loopRunes, Relics and Divine ItemsRunes add temporary effects per run; relics and divine items offer long-term gearAllows both experimentation and custom build scalingCo-Op (Local and Online)Two-player mode, where host upgrades benefit both; guests can copy host’s saveEnables shared runs, though guest save progress has limitsNarrative and Home SequencesStory bits, memories, and character interactions evolve at the family home between runsAdds emotional weight and unlocks new contentDifficulty ScalingEnemy strength rises and optional harder modes (Trials) provide challengesKeeps late gameplay engaging and offers special goalsAchievements, Completion and MissablesAchievements tied to relics, traits, and events; some content can be skippedCompletion requires systematic runs and exploration Resource Note: Save gemstones rather than hoard chests early. The merchant often offers relics, Graces, or useful upgrades you’ll regret missing. 3. Family Progression, Runes, and Relics Family progression Between runs you spend gold and Morv at Uncle Ben’s Workshop and in the Book of Rea to unlock permanent upgrades and Family Traits. These upgrades raise base health, damage, resource drops, rune durability, and other global bonuses that persist across runs and change how each hero scales. Invest early in economy and rune/Divine Relic slots to widen your options later. Runes Runes are temporary, ability-specific modifiers you find during dungeon runs. You can socket one rune per attack or skill, the rune loses durability as you use that skill, and runes disappear on death. The Book of Rea contains upgrades that unlock rune access and increase rune durability, so homestead investment directly improves how reliably you can use runes. Relics and Divine Relics Relics and charms are persistent equipables you obtain from chests, shops, or elite encounters and carry between runs to shape long-term builds. Divine Relics are a separate class of active, run-bound items that grant strong, usable abilities during a run. You can hold and use Divine Relics with cooldowns, but you lose them on death. The Book of Rea can also unlock upgrades that add a second Divine Relic slot and reduce cooldowns. How they work together Use Family upgrades to shore up weaknesses so your chosen hero survives longer and can safely test runes. Treat relics as your steady, long-term toolkit, and treat runes and Divine Relics as short-term modifiers that let you adapt to a single run. Prioritize Book of Rea upgrades like Runic Knowledge and Divine Relic Mastery, and prioritize Ben’s Workshop upgrades that boost survivability and resource gain for consistent progression. Practical Tip: Kite dangerous monsters to the safety of glowing gates, hit them with AoE, and dash inside while your skills cool down. 4. Characters, Roles, and Playstyles The Bergson family includes multiple playable members, each with unique weapons, skills, and progression trees. Roles include shield-tank, ranged kiting, high-speed melee, and magic hybrids. Switching between characters helps mitigate corruption fatigue (a health penalty for overuse) and distributes Family XP across multiple members, promoting more balanced growth. Quest Tip: To collect all hidden side quests (like the wolf pup, wine machine, automata, stargazer), revisit zones several times. The triggers are often RNG and not guaranteed in one run 5. Vaults, Biomes, and Boss Structure Vaults are procedurally generated dungeons divided into biomes (e.g. Postigala Forest, Caeldippo Caves, Masks Temple) with distinct enemies, environmental hazards, and layout themes. Runs include minibosses, side rooms, resource nodes, and culminate in a biome boss whose defeat advances story beats and unlocks new upgrades or access to new biomes. Pro Tip: Play each character enough to rank them and unlock family buffs. Resist sticking to a favorite all the time to reduce corruption penalties. 6. Co‑Op, Modes, and Save Notes Children of Morta supports both local and online co-op in Story mode and (to an extent) Trials / Family Trials. Online co-op was added post-launch, and permanent progression, i.e. Family XP, relic unlocks, and homestead upgrades is recorded to the host’s save during shared sessions. Additional Considerations: Survival Tip: Don’t rush. Clearing full maps and side events often yields health potions, relics, and upgrades that make later floors safer. 7. Practical Strategies and Advanced Tips These tips focus on maximizing progression, making each run count, and adapting to Biome challenges. They cover use of relics, character rotation, run rewards, and strategy combos. Use them to smooth out difficulty spikes, boost your loot, and expand your mastery across Vaults. Combat Tip: Pay close attention to cooldown meters. Combine dodges, AoE abilities, and retreats . Sometimes, retreating and resetting is safer than overcommitting. 8. Conclusion Children of Morta offers more than just dungeon crawling, it invites you into a saga of courage, resilience, and familial bonds. Every run matters: your choices, character rotations, and upgrades all compound toward mastery. Use this guide to avoid pitfalls, pursue every relic and achievement, and tailor your playthrough to your style. But most importantly, embrace the story, adapt your tactics, and let the Bergson legacy endure!

CS2 Cases Explained: Odds, Safety, and Smart Case Opening
How CS2 Cases Work—The Basics Every weapon case is built around a reward pool organized by rarity tiers: Consumer, Industrial, Mil-Spec, Restricted, Classified, and Covert, plus an ultra-rare special item (typically a knife or gloves). Three concepts matter most for decision-making: Understanding this framework prevents common misconceptions—like assuming “streaks” influence odds or that time of day quietly boosts drop chances. Each roll is independent. Where Value Comes From (and Where It Doesn’t) In case opening, value is demand-driven. That demand fluctuates with content updates, creator spotlights, and shifting player preferences: Meanwhile, hype alone rarely sustains prices. New cases may spike early, but supply catches up. Treat early openings as entertainment with a shot at social value (clips, screenshots) rather than a guaranteed flip. A Short History and Ecosystem View For years, case opening has been a key component of Counter-Strike, growing in tandem with trade systems, content drops, and marketplace features. The loop is maintained in CS2, as players trade or sell stuff they don’t keep, open cases to pursue cosmetics, and progressively construct themed loadouts. The economy as a whole is driven by this loop; headline prices are not as important as liquidity, or how quickly an item sells at a reasonable price. Even if particular art pieces appear more stunning, popular, “evergreen” skins typically move more quickly. Choosing What to Open—A Goal-First Approach Four common goals guide case selection: Practical rotation: keep three cases in play—one premium chase, one aesthetic favorite, and one recent/popular—so sessions feel varied without drifting into impulse territory. Bankroll and Session Design—Discipline Over Hunches Odds don’t bend to “feels,” so structure does the heavy lifting: Price Awareness Without Heavy Math A perfect expected value (EV) calculation is impractical for most players, but price awareness gets close: For game update context and live pricing snapshots, the official Counter-Strike hub is helpful for understanding demand catalysts, and the Steam Community Market is useful for liquidity checks. Safety and Fairness—A Quick Due-Diligence List Outside of Steam, treat due diligence as mandatory: Combine platform safety with bankroll discipline for the best overall experience. Myths, Debunked A Practical Opening Routine (Repeatable & Calm) Making Commons Count—Loadout Design That Works Since commons are frequent, design around them: Trading and Liquidity—Moving Items Efficiently Opening is half the story; moving items is the other: Responsible Play and Mindset Instead of treating case opening as an investment strategy, use it as enjoyment with a collection goal. The long-term winning mentality is curating rather than chasing: create a look you like, budget for average results, enjoy the occasional high, and quit on time. That method reduces tilt and increases contentment. Conclusion The CS2 case opening is at the nexus of player-driven markets, aesthetics, and probability. When openings adhere to a clear plan, the odds don’t change, but the results feel better and expenses stay under control: pick instances that align with your objectives, enforce strict bankroll guidelines, keep an eye on realistic pricing, and uphold strict platform security and transparency requirements. With that framework, case opening stops being a frenzied quest for lightning-in-a-bottle moments and instead becomes a methodical approach to curating a loadout that looks fantastic in play.
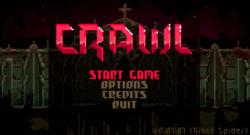
Crawl Walkthrough Guide: Master Both Hero and Spirit Roles
1. Game Overview Crawl is a fast-paced, local multiplayer dungeon crawler in which one player acts as the hero exploring living dungeons while up to three others assume the roles of hostile spirits controlling traps and monsters. When a spirit kills the hero, that spirit becomes the new hero and the cycle continues as everyone competes for experience, loot, and the chance to face the final boss together. Matches typically last around 30 minutes, with each round offering unpredictable dungeon layouts, evolving enemy powers, and shifting alliances. Quick Reminder: Always scout for corridors or tight chokepoints because fighting in open rooms invites flanking and chaos. 2. Core Facts Table (Quick Reference) SystemWhat it doesPlayer impactHeroRuns dungeon, collects XP/gold, buys gear, reaches level 10 to fight bossGoal‑driven progression and resource management; primary win conditionSpiritsFloat through rooms, possess traps and monsters, earn wrath to evolve monstersIndirect control of dungeon threats; objective is to kill the hero and take overWrath and EvolutionWrath currency allows spirits to evolve monsters between floorsDetermines monster strength and options spirits have to pressure heroBossFinal multi‑limbed encounter controlled partly by spiritsHero win requires destroying all limbs while spirits coordinate attacksVault & UnlocksPersistent unlocks for monsters, items, deities and cosmeticsLong‑term goals that expand tactical variety and replayability Practical Tip: Learn each monster’s attack patterns and weaknesses early because that knowledge dramatically improves your ability to counter them as a spirit. 3. Mechanics, Roles, and Controls Hero basics The hero explores procedurally generated dungeon rooms to gain XP and gold, buys items in shops, equips weapons, magic and relics, and levels up to ultimately reach level 10, which unlocks a portal to the final boss area. (When the hero reaches level 10 and enters the portal, they must defeat a boss whose limbs are controlled by the spirits.) Spirit basics Spirits move invisibly throughout the dungeon and can possess traps, monsters, or spawn points (spawners). Once possessing an entity, they act through that entity until it is killed or until possession ends. Controls and UI (local play) CRAWL supports controllers and keyboard input. Local multiplayer assigns each player a separate input device. The HUD displays hero health, XP, gold and current floor. Spirit players get indicators for nearby possession targets and current wrath. Resource Note: Use the Vault’s “practice mode” to try monsters you haven’t unlocked in live matches. It’s a safe place to get comfortable with their moves. 4. Dungeon Progression, Floors, and Boss Mechanics Dungeon flow Floors generate procedurally and include themed rooms, monster spawn points, event rooms, and a shop on each level. Clearing rooms gives the hero XP, gold, and loot; meanwhile spirits earn wrath and between floors use it to evolve monsters or unlock stronger variants to counteract the hero’s build and pace. Boss mechanics and limb control Once the hero reaches level 10, the portal to the final boss opens and entering it triggers a multi-limbed boss encounter. During the boss fight, spirits can possess or control boss limbs (or summon/control creatures or mechanisms tied to the boss) to harass and defend against the hero. The hero must destroy all limbs and then damage the core (or head) to win. Boss Tip: In the Kourok fight, sending a grub into its open mouth exposes its brain briefly and disables its attacks. So, use that window to deal heavy damage. 5. Unlocks, Vault, and Deities Vault and unlock system The Vault records monsters, weapons, items, traps, and dungeon objects that you have encountered or used in matches. Monsters unlock in the Vault after you play as or encounter them. The Vault lets you revisit these unlocked monsters in a “practice mode” to test builds or understand mechanics. Deities and their effects At the start of each match, every player selects a deity to worship. Each deity gives a unique bonus or starting equipment and determines which monster types spirits can summon or control. Deities influence the monster pool, passive modifiers, and item availability, thus shaping both hero and spirit strategies. Unlock Tip: As an unlockable option, a player may choose “No-one”, i.e. refuse to worship any deity, which triggers a taunt of a specific god. This imposes a deity-specific penalty (for example, weaker stats or restricted items) but also alters the monster set in unique ways 6. Beginner Roadmap (First 5 Matches) Get comfortable with hero & spirit basics (Match 1) Focus on build planning and risk management (Match 2) Experiment with deity synergies and monster evolutions (Match 3) Push for a boss run (Match 4) Refine strategies and aim for full boss victory (Match 5) Quest Tip: Some achievements require you to kill as a specific monster or under special conditions. So, plan a run around those unlocks when you’re comfortable with core play. 7. Advanced Tactics (Hero and Spirit) Advanced Hero Tactics Pro Spirit Tactics Survival Tip: Buff yourself early and often. Buffs don’t help when you’re dead 8. Local Multiplayer, Bots, and Practical Session Tips Session setup Balanced match advice Pro Tip: Rotate hero and spirit roles regularly. This ensures everyone learns both sides, and lets you spot synergy and counter strategies you might otherwise miss. 9. Achievements, Challenges, and Completion Advice Crawl has 45 achievements. The achievements cover a wide variety of goals: spending gold, killing monsters, discovering vault entries (weapons, items, etc.), boss-fights, doing specific feats with monsters, or avoiding dying in certain ways. The game includes a “Vault” feature with monster challenges. You can pick a monster and attempt to kill a number of AI controlled heroes (adventurers) with that monster. The AI gets harder and better equipped in higher challenge levels. These challenges help you practice with different monsters and learn their capabilities. Completion Advice (Going for 100%) Here are tips to help you unlock achievements and tackle challenges more efficiently: Combat Tip: If approaching the boss melee, use a fast weapon with hit-and-run tactics or switch to ranged/aoe tools. Staying in close too long invites punishment 10. Conclusion By following this guide from fundamentals to advanced strategy, you will build confidence in both hero and spirit roles. Victory in Crawl comes from adaptability, timing, and understanding your opponents, not raw power. Use early runs to experiment, pick deities and build paths that suit your style, and push steadily toward full completion. Over time, you will shift from learning to perfection!

Severed Steel: Full Walkthrough with Resource Tips, Survival and Pro Moves
1. Game Overview Severed Steel is a stylish single-player FPS that puts you in the role of Steel, a nimble, one-armed sharpshooter. You will fluidly chain together stunts like wall runs, dives, and slides to navigate and destroy dynamic voxel environments. With no way to reload, players must skillfully disarm enemies in slow motion to steal their loaded weapons and continue the fight. Heads-Up: The “Angled Slide” glitch (holding forward + strafe then slide) can boost your speed from roughly 850 to ~1400 units/sec, making it a major mobility advantage 2. Core Facts Table (Quick Reference) Understanding how the game’s key systems work will give you a solid foundation for mastering each level and building effective strategies. Below is a concise table that breaks down the main gameplay systems, what they do, and how they impact your playstyle. Use this as a quick-reference to guide your decisions in-game. SystemWhat it doesPlayer impactMovement and ParkourParkour‑style traversal (slides, wall‑runs, vaults) with emphasis on momentumPositioning and movement enable offensive options and survivabilityBullet‑time and CinematicsPlayer‑triggered slow‑motion allowing precise aiming and cinematic killsSkillful use converts chaotic encounters into manageable windows for headshots and chain killsDestructible EnvironmentsEnvironments are highly destructible, affecting sightlines and coverMap control and cover are dynamic; destruction opens or closes tactical optionsWeaponsVaried firearms (pistols, shotguns, rifles) with distinct handling, recoil and damageWeapon choice influences movement rhythm and engagement rangesScoring and ChallengesPerformance metrics (time, accuracy, combos) and optional challenge objectivesReplayability through leaderboard competition and challenge mastery Quick Reminder: Use destructible geometry (walls and floors) aggressively to open shortcuts and surprise enemies. The game designs levels with that in mind 3. Mechanics and Systems The game’s combat is built on a foundation of fast, acrobatic movement and environmental destruction. Key systems include: Survival Tip: Stay mobile. The game’s bullet-time and stunt mechanics reward constant movement, therefore standing still is the fastest way to die 4. Levels, Campaign and Objectives In Severed Steel, you play as the one-armed sharpshooter taking on a mission against the mega-corporation EdenSys. The Campaign comprises six compact story chapters. Within those chapters are multiple individual levels (maps) built around intense, stylised movement and combat. Campaign Update 3.0 added 12 new levels to both the Campaign and Firefight modes, expanding the total pool of levels and refreshing the experience. The game is structured across several modes, with levels designed as non-linear combat arenas to complement the movement systems: Enemy Types Steel faces a diverse roster of enemies from the EdenSys corporation, each requiring different tactics: Soundtrack The game features a critically acclaimed soundtrack composed by Floating Door. The score is a dark, atmospheric mix of electronic, ambient, and thumping drum and bass tracks that dynamically match the on-screen action, enhancing the game’s stylish, cyberpunk aesthetic. Pro Tip: Bind weapon-throw (default “G” on PC) to a convenient key. Thrown weapons count toward combo multipliers (e.g., “Throw Hit”) and can launch stun into kill. 5. Beginner Roadmap Step 1: Complete the Campaign Mode This is the perfect starting point. The main story is relatively short (2-4 hours) and designed to introduce you to the core mechanics and story. Step 2: Dive into Firefight Mode After beating the campaign, Firefight is your training ground for mastery. Step 3: Replay the Campaign in New Game+ Once you’re comfortable with your skills and have some unlocks, it’s time for a real challenge. Step 4: Conquer the Rogue Steel Mode This is the final step for a player who has a strong grasp of the game’s mechanics. Resource Note: Your slow-motion meter regenerates by performing stunts and killing enemies, so keep momentum going rather than stopping to aim leisurely. 6. Advanced Strategies and Tactics In this game, success hinges not just on firepower but on mastering movement, environment and timing. The action rewards you for sliding, wall-running, diving and chaining your stunts while the enemies surround you. The seven advanced strategies that follow show how to make the most of stunts, weapon pickups, destructibility and bullet‐time to elevate your runs. Boss Tip: When facing tougher heavy enemies, use the charged Arm Cannon shot for one-shot eliminations where possible, letting you maintain mobility rather than slugging it out. Conclusion You have now journeyed through every level, uncovered key objectives, and honed tactics for both style and efficiency. With this guide as your foundation, you’re ready to refine your runs, explore alternate paths, and replay under tougher conditions for the greatest challenge. Stay fluid, stay aggressive, and turn every encounter into an opportunity for spectacular execution.

ITTA Boss Rush Walkthrough: Win Every Fight and Find Every Secret
1. Game Overview The game is a bullet-hell action-adventure in which you play as a young girl who awakens in a surreal, ruin-choked world after discovering her family’s demise and is guided by the spirit of her pet cat. With only a revolver at her side, she must explore desolate hubs, collect powerful spirit weapons, and face 18 punishing bosses in intense twin-stick combat. Exploration and narrative intersect between encounters, offering a melancholic yet stylish world filled with secrets, weapon upgrades, and optional accessibility features for varying skill levels. Heads-Up: In ITTA you won’t find hordes of weak enemies in the overworld because most of the action occurs in boss arenas. 2. Getting Started and Basic Controls When you begin ITTA you control Itta, armed initially with the father’s revolver and accompanied by the ghost. You will begin in a hub-area (Old Garden) and gradually unlock new zones by defeating bosses and collecting key weapons. Use twin-stick style movement: one stick (or keys) to move Itta, the other aims and shoots. You dodge attacks, use the roll/dodge mechanic to evade, switch weapons and explore. The game allows toggling of damage multipliers or invincibility if you find fights too strenuous. Quick Reminder: You can activate the “2x Damage” or full “Invincibility” accessibility options if a boss fight is proving too steep. 3. Early Area: The Old Garden You start in the Old Garden. Follow the trail of blood to your mother and trigger the first major story beat. Exploration Weapon pickups Minor Boss and Path Forward Clear the first regional mini-boss to unlock progression to the next major zone. After defeating the first boss, you unlock access to the Glass Gardens zone. Practical Tip: Explore each hub area thoroughly before diving into the next boss because hidden weapons and upgrades often make the difference 4. Second Area: The Glass Gardens Once you enter the Glass Gardens you will see larger open spaces, new puzzles (light-pillars, blocked paths) and more dangerous boss fights. Make sure to: Puzzle Elements In the Gardens you will find barrier pillars requiring the Flamethrower to light them and open paths. Search broken walls, hidden entrances and secret rooms. Explore thoroughly. Boss Engagement One of the region-bosses is located in this area. Prepare by collecting above weapons, health upgrades and Inner Beast upgrades. Before attacking the boss, ensure you have at least one non-basic weapon and the path to exit is clear. Upgrade Locations Resource Note: Community guides list full locations for weapons, inner-beast upgrades and cat statues, so keep a tab open if you’re 100%ing it. 5. Final Area: The Yorke Ruins After clearing the Glass Gardens boss, you proceed to the Yorke Ruins, the third region of the game, with the toughest foes and final boss. Important Items Combat Preparation Make sure you have all weapons collected (Revolver, Shotgun, Cannon, Bomb, Machinegun, Flamethrower, Greatsword, Scythe) to exploit their strengths. Make sure all health upgrades and Inner Beast upgrades are collected. Final Boss The final boss, Mono, awaits at the end. You must have explored enough to access the Void Gate area. If you want the “Going Home” achievement, ensure you return to the starting room after killing ten bosses and trigger the cut-scene. Note: this achievement is missable if you skip that return. Quest Tip: If you get stuck on a boss, remember you can return later after collecting a new weapon or upgrade rather than brute-forcing the fight immediately. 6. Weapon and Upgrade Locations This section compiles key weapons and upgrades in one place for easy reference. Weapons Health and Inner Beast Upgrades Strategy: Focus on collecting weapons early that suit your play style. If you prefer wide spread and crowd control, lean Shotgun and Machinegun. If you prefer high-damage bursts, target Cannon and Greatsword. Always grab health upgrades as soon as you spot them because survival in boss fights beats fancy weapons. Pro Tip: Even if a new weapon looks flashy, don’t abandon your reliable spread or shotgun too early. Many players report defaulting to it despite the variety. 7. Boss Fights Strategy Boss fights in ITTA revolve around pattern recognition, exploiting weapon strengths, and dodging with precision. General Tips Example Strategy: Region Boss in Glass Gardens Enter the arena with full health and at least one heavy ranged weapon. Wait until the boss emits red glows or summons minions. Then switch to Machinegun to clear adds, then Cannon to hit the boss during vulnerability. When pillars/light barriers appear requiring Flamethrower later, ensure you have unlocked it. Final Boss (Mono) The final boss uses multiple phases: bullet-hell patterns, summoned minions, and environmental hazards. Use all your collected weapons interchangeably: begin with Revolver or Shotgun to stay mobile, then switch to heavy weapons when openings appear. Make sure your health and Inner Beast upgrades are maximised before this fight. Missing one upgrade makes the fight significantly harder. Boss Tip: Don’t panic when you hit a boss’s second or third phase and it unleashes a new bullet-pattern; that’s part of the design. Reset your rhythm and stick to your dodge-shoot loop 8. Collectibles and Achievements If you aim for 100% completion, this section helps you gather everything. Cat Statues The game hides 18 “Spirit Cat” statues across zones. Finding all unlocks the “Cat Lady” achievement. Important Achievements Collectible Route Suggestion Quest Tip: For the Shepherd side-quest, track down his missing sheep and return to him. You must speak to him several times to trigger the full event Conclusion You now have a detailed walkthrough for ITTA from start to finish: from your first steps in the Old Garden, through the Glass Gardens, into the Yorke Ruins, collecting all weapons, upgrades and secrets, and tackling each boss with strategy. The key to mastering ITTA lies in exploration, collecting the right gear, learning each boss’s pattern, and playing actively.i.e. dodge first, strike when the opening appears. With patience and skill you can unlock all achievements, complete the full map, and experience the full narrative of Itta’s journey. Good luck, and may your cat-spirit guide you through the Void Gate!

How to Speedrun Hotline Miami: Tips, Tricks and Route Breakdown
Game Overview Story and Setting Hotline Miami is a 2D, top-down action game set in Miami circa 1989. You play as a silent protagonist who receives mysterious messages on his answering machine instructing him to carry out massacres at various locations. The narrative quickly becomes surreal and explains very little explicitly, creating an atmosphere of uncertainty. Gameplay Mechanics Each chapter begins with your avatar receiving a call, selecting a mask (which grants certain perks or changes gameplay) and entering a building full of armed enemies. You must clear the level by eliminating all enemies through melee weapons, thrown weapons, guns or improvised methods. This typically results in one-hit deaths for both the player and the enemies. The visual style is neon soaked, retro, brutal and fast-paced. Why It Matters for Speedrunning Because the game features one-hit deaths, tight layouts and high enemy density, speedrunning the game demands memorization, precision, risk assessment and routing. You’ll need to select masks, plan the fastest path through rooms, manage weapon usage, minimize deaths and optimise transitions between levels. The combination of aggressive action and high penalty for mistakes makes it ideal for the speed-running discipline. Quick Reminder: Melee weapons are silent and attract less enemy attention than guns, so use them in tight rooms when possible. Categories and rules Here are the most common categories in the Hotline Miami speed-running scene: Before you begin a serious attempt, join the community to check current rules, leaderboards and category definitions. Practical Tip: Before launching an assault, observe enemy patrol patterns and room layouts because effective routing reduces risk and resets. Preparation: game version, controls, mindset Game Version Make sure you’re running the correct version of the game for your target category. Some versions crash more often or have different memory behaviour. Controls and Settings Mindset Speedrunning is as much about pattern recognition, planning and consistency as reflexes. Beginners should expect lots of resets and practice runs. Focus on incremental improvement rather than immediately going for world-record. Quest Tip: In each level you receive a call or message before the mission. Treat it as your trigger to pick mask, plan route and strike quickly Level-by-level strategy Because Hotline Miami is structured in a sequence of numbered levels (e.g., “Metro”, “No Talk”, “Overdose”, etc.), a full run depends on optimising each level’s route, enemy kills and transitions. Example Route Tips Survival Tip: If you run out of ammo for firearms, switch to melee weapons immediately because they’re quieter and lessen your exposure. General techniques and tricks Beyond level-by-level execution, here are some techniques that good runners use: Pro Tip: Use the thrown-weapon mechanic not just to kill but to disrupt enemy formations; a well-thrown knife or bottle can knock down multiple foes Common mistakes and how to correct them Combat Tip: The knife is fast enough that consistently holding down the attack button can make you nearly immune to melee attackers, i.e. when the direction is right Resources and community Here are some excellent starting points for deeper engagement: Join the community Discord and Reddit forums for real-time advice, updates on new routes, glitches or rule changes. Boss Tip: While there are no traditional “bosses” in the usual sense, the level transitions and end-of-chapter set-pieces act like mini-bosses. So, treat them as distinct challenges by resetting your mask and weapon loadout and re-scouting the room. Conclusion Speedrunning Hotline Miami offers a thrilling blend of fast-paced action, pattern memorisation and optimisation. So, by preparing properly (version, controls, route), mastering individual levels, applying general techniques and avoiding common mistakes, you can make serious progress. The community resources and leaderboards are active and there’s always more to learn. Most importantly, have fun with it. Each successful run is built on practice, patience and iteration. Good luck, and get that fastest time!

How to Beat All Bosses and Get the True Ending in Kaze and the Wild Masks
Platforming 101: Kaze’s Core Abilities Before you harness the masks, you must master Kaze’s basic moveset. Kaze controls with incredible precision. Heads-Up: For the “Oops!” achievement, you must complete a level without collecting a single purple crystal. Many players find Level 2-8 (“Pumpkin Pyre”) to be the easiest stage to accomplish this, as you can use the Lizard Mask to run and jump over most crystal paths. The Completionist’s Checklist: All Collectibles Every level in Kaze and the Wild Masks contains three types of collectibles. You must find all of them to unlock the game’s true ending. Quick Reminder: You can change the difficulty at any time on the world map. “Original Mode” provides the intended challenge with two hits, while “Casual Mode” grants Kaze an extra heart (three hits) and adds more checkpoints to difficult levels. Harness the Ancients: The Four Wild Masks As Kaze explores the islands, she finds special altars that grant her the powers of the Wild Masks. These masks transform Kaze and give her new abilities, completely changing the gameplay for that level. Practical Tip: Kaze’s ground pound (Down + Jump in mid-air) is not just for breaking blocks. You can use it as a fast-descending dodge, and it is also the only way to flip over certain shielded enemies. World 1: Forgotten Grove Walkthrough The Forgotten Grove serves as your introduction to the Crystal Islands. It focuses on Kaze’s core mechanics and introduces you to basic enemies like hopping carrots and bean pods. Your goal in this world is simple: mastery. Practice using Kaze’s ear-twirl to find hidden paths and K-A-Z-E letters. In “Lights On Lights Off,” you must hit switches to illuminate platforms. Use the light to spot bonus portals. In “Vine Climb,” time your jumps carefully as you ascend. The chase level, “Oh, My Veggies!”, requires you to run from a giant, angry vegetable. Do not stop and keep your momentum. Resource Note: Purple crystals are used on the world map to unlock special bonus levels (marked with a “B”). These are different from the two hidden bonus portals found within each main level. World 2: Frozen Mountains Walkthrough This frosty world introduces more complex platforming with slippery ice physics and strong gusts of wind. Here, you will find the Eagle and Tiger masks. In “Sliding Salads,” you navigate icy slopes where Kaze slides automatically. “Tiger Popsicle” introduces the Tiger Mask, forcing you to master the wall-pounce and air-dash to climb vertical shafts. “Slingshot Ride” uses cannon-like plants to launch Kaze across huge distances. “Arctic Blizzard” features the Eagle Mask. You will fly through canyons, dodging projectiles and shooting feather-blockades. The level “Forgotten Mask” is a notoriously difficult auto-runner stage using the Lizard Mask, so prepare for a challenge. Quest Tip: When hunting for the K-A-Z-E letters, listen for a specific shimmering sound. This audio cue plays when a letter is nearby, even if it is hidden off-screen or behind a false wall. World 3: Toxic Tide Walkthrough The theme of this world is poison and water. Rising tides of purple goop and dangerous underwater sections define these levels. This world is where you will first use the Shark Mask. “Toxic Lake” is a signature level that perfectly demonstrates this world’s gimmick. It is heavily inspired by classic Donkey Kong Country 2 levels, featuring a rising tide of toxic liquid that forces you to climb upward quickly and precisely. Other levels introduce the Shark Mask, requiring you to navigate underwater mazes. You must use the shark’s charge attack to break barriers and fight off piranhas and other aquatic foes. “Gusty Cliffs” will test your Eagle Mask skills once again with intense wind-based platforming sections. Survival Tip: Do not worry about failing the hidden bonus stages. Unlike the games that inspired it, the game lets you immediately retry a bonus stage as many times as you need without forcing you to restart the entire level. World 4: Carrotland Walkthrough The final world is a perilous, lava-filled landscape full of advanced challenges. Carrotland demands mastery of all masks and mechanics. The Lizard Mask appears frequently here for some of the game’s toughest speedrun stages. “Ziplizard” is a pure test of your reflexes, combining the high-speed auto-running of the Lizard Mask with ziplines. “Hurry Hurricane” is another chase level, but this time you flee from a deadly tornado. “Scalding Gears” features intricate platforming around moving cogs and lava pits. The secret level, “Bulletvator,” is an intense challenge where you ride a small platform while dodging screens full of projectiles. This world throws everything at you before the final confrontation. Pro Tip: After you beat a level, you unlock its Time Trial mode. In this mode, you start with a single heart. This means you can actually take one hit and still successfully complete the run, so a single mistake is not an automatic failure. Boss Guide: How to Beat Every Boss Each of the four worlds ends in a creative, multi-phase boss battle. Combat Tip: Shielded enemies like the Corn or Watermelon cannot be damaged from the front. You must either jump on top of the Corn or get behind the Watermelon to defeat them with your spin attack. The True Ending: How to Unlock the Final Secret Defeating Typhoon provides the standard ending, but a true conclusion awaits skilled players. To unlock the true final boss and see the 100% ending, you must complete the following tasks: Once you achieve 100% completion, you can challenge the true final boss after defeating Typhoon. This secret battle is the game’s ultimate challenge and provides the canonical, happy ending for Kaze and Hogo. Boss Tip: To unlock the true final boss and get the “My Best Friend” achievement, you must achieve 100% completion. This fight is a difficult endurance test that relies on pattern recognition, so focus on dodging its “bullet hell” attacks and only strike when it is safe. Conclusion: Saving the Islands Kaze and the Wild Masks is a challenging and rewarding adventure that honors the best parts of 90s platformers. It demands precision, exploration, and perseverance. By mastering Kaze’s moves, hunting down every collectible, and harnessing the power of the Wild Masks, you can overcome every obstacle. You now have the knowledge to face the enraged vegetables, conquer the tricky levels of Carrotland, and save Hogo. Go get those gems, find those letters, and show that curse who is boss! Good luck.

Evoland Full Game Walkthrough (8-Bit, 16-Bit, and 3D Explained)
Part 1: The 8-Bit Beginning (Unlocking the Basics) Your adventure begins on a single, green-and-black screen. Your first task is simple: Walk! Heads-Up: The Black Citadel is the game’s final dungeon and a point of no return. So, once you enter, you cannot go back to the world map to find any missed Stars or Galam Cards. Part 2: Edel Vale and the 16-Bit Revolution You emerge from the cave and the world changes dramatically. A chest right outside unlocks 16-Bit Graphics, upgrading the entire visual style. Quick Reminder: Riding a Choboko on the 3D world map is not just faster, it also completely prevents all random ATB (Active Time Battle) encounters. Part 3: The Sacred Grove (A Link to the Dungeon) You and Kaeris enter the Sacred Grove, which functions as the game’s first Legend of Zelda-style dungeon. Practical Tip: During the 3D Action-RPG (Diablo-style) segments, Kaeris will automatically heal you when your health is low. However, if you just stand still for a few seconds, she will often top off your health, saving you from a tight spot. Part 4: The World Map and Active Time Battles When you exit the Sacred Grove, you unlock the single biggest change in the game: the 3D World Map. Your main quest objective is to fly your airship to the large, southern continent and find the entrance to the Crystal Caves. Resource Note: You cannot buy 99 potions right away. So, you must find specific “Item Slots” chests hidden in the world to increase your maximum carrying capacity for items like Potions and Phoenix Downs. Part 5: The Crystal Caves (An Action-RPG Detour) Brace yourself for another complete genre shift. As soon as you enter the Crystal Caves, you unlock 3D Action-RPG Gameplay. Defeating the Guardian gives you the Journal, which updates your quest. You learn that the “Root of Evil” resides in the Black Citadel. Quest Tip: Do not forget to backtrack. So, after you unlock Bombs in the Sacred Grove, return to the Noria Mines (the cave west of Edel Vale) to fully explore it and find the critical “Full Heal” party upgrade. Part 6: The Black Citadel (The Final Gauntlet) Fly your airship to the foreboding, volcano-like structure in the center of the world map. This is the Black Citadel, the final dungeon. Survival Tip: In all Active Time Battles (ATB), protect Kaeris at all costs. She is your only healer for most of the game, so if she gets knocked out, you will likely lose the battle. Part 7: Collectibles Guide (Stars and Galam Cards) While we pointed out collectibles along the way, here is a quick overview of what they do. Collectible Hunting Tip: The most important upgrade for collectibles is the Heal-All chest. It is hidden in the Noria Mines (the cave you skipped earlier). Once you have the bombs from the Sacred Grove, you can return to the mines. Inside, the chest “upgrades” Kaeris’s heal to Full Heal, which also revives Clink if he dies. More importantly, it heals you after every battle, making exploration and hunting for the remaining collectibles much easier. Pro Tip: When playing the “Galam E-Dub” card game, look for the “Choboko” card early on. It is one of the strongest rare cards you can get, with powerful numbers on all four sides, and will help you easily win against most NPCs. Part 8: The Final Boss (Defeating Zephyros) You reach the throne room and confront Zephyros, the Root of Evil. This final battle is a multi-phase gauntlet that mirrors the game’s evolution. Boss Tip: For the final ATB phase against Zephyros, Clink’s “X-Strike” is your best source of damage, so save his ATB gauge for it. Use Kaeris to heal whoever Zephyros hits, and use Potions to heal the other party member after his party-wide “Dark Breath” attack. Conclusion: The Evolution is Complete Congratulations! You have defeated Zephyros and saved the world of Evoland and witnessed the birth of gaming, from a silent, 8-bit screen to a full-fledged 3D adventure. You unlocked sound, music, color, and complex mechanics, all while completing a charming and nostalgic quest. A simple 2D sprite evolve into a 3D hero, and you were there for every step. You have completed one of the most unique RPGs ever made. We hope this guide helped you on your journey through the history of video games!